| squirrion | |||
|---|---|---|---|
|
lion
|
squirrel
|
||
|
finale product should look like
|
tutorial:
1. get our two pictures, unfortunately I did not find the same lion as in the video
2.name the layers 3. duplicate the squirrel layer 4.use the patch tool on the copy to remove the head of the squirrel 5. go to the lion picture and use the lasso tool to select the lions head 6.copy and paste it on the squirrel image 7.add the vector mask underneath the lion layer 8.using the pen tool get rid of the rest of the background 9.if its not working for an odd reason change the color of the pen to black 10.crop the lions head to fit the squirrel 11.erase some of the lion to show the squirrels arm 12.drop the opacity and hardness on the pen tool and erase the lions main a bit to blend with the squirrels neck 13.go to color balance and adjust the lions head to be as same looking as the squirrel 14.then we go to brightness/contrast and adjust the lions head 15.the merge the lions heads with the adjustments we added 16.select the smudge tool and go around the main to add more hair 17.with the pen tool add the whiskers 18.go to photo filter and make the density 50% 19.last just add the watermark and do whatever more you want | ||
Wednesday, February 26, 2020
Photoshop Morphing - YOUR OWN tutorial (infotech12)
Thursday, February 20, 2020
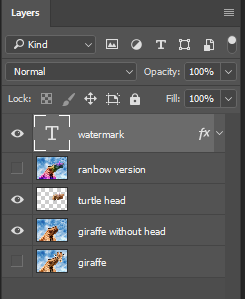
Photoshop Morphing - CassoGirafurtle (infotech12)
| CassoGirafurtle | ||
|---|---|---|
|
cassowary
|
giraffe
|
matamata turtle
|
|
cassogirafurtle
|
tutorial
1. first we get the pictures we want 2.we cut the parts of the animal we want and save them 3.don't forget to rename each layer 4.refine the edge of the animals to clean up the edges 5.add the parts of the animals to the main picture 6.use clone stamp tool to merge the animals together and make it look better or like they belong together. 7. select different animal parts and select color balance to change the color of the animal as close the main as possible 8. add the water mark 9.you can change the background if you want I didn't, and do whatever else you want. | |
Thursday, February 13, 2020
Photoshop Morphing - CrocoFrog (infotech12)
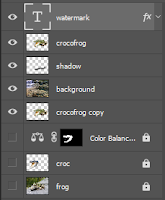
photoshop morphing- crocofrog
|
||
|---|---|---|
|
original frog
|
original crocodile
|
|
| progress
1. get your images
2. size down the frog image to 1024 pixels in width 3. remember to rename your layer too frog 4. now that we're done with the frog image we go to the crocodile image 5. don't forget to rename the layer to croc or crocodile 6. now for the most time consuming step, erase the background of the croc picture 7. we also don't want the neck so erase by the jawline 8. now quick select the cut out of the croc head 9. go to the refine edge and play with the values until you like how it looks, try to make it look like its not cut out 10. deselect the image and now were ready to move the head to the frog 11. ctrl a, and ctrl c, to copy the head and ctrl v, to paste it onto the frog picture 12. ctrl t, to select the croc head 13. hold shift and scale down the croc head and move it around to fit the frog, then press enter when your done 14. select your clone stamp tool and hold down alt on the area that you want to clone 15. now lets get rid of the crocs eye by left clicking on it 16. now just like how we covered the crocs eye with the clone stamp tool, we will blend the crocks skin with the frogs on the face and jaw 17. now with the eraser tool we will erase the croc by the frogs eyes to open them up more 18. now go back to the quick selection tool and select the crocs head again 19. now go down to the, create new fill adjustment layer, and choose color balance 20. with midtones selected, drop the red to -13 and the yellow to -98 21. now with the eraser tool erase the mouth and teeth to its original color 22. use the burn tool to add a bit of shadow to the jaw 23. then use the brush with the opacity of 81% to create a shadow under the crocs mouth, make sure your on the frog layer for this part! 24. you can change the background like I did just by cutting out the frog from its original picture and adding a new background pic 25. add your water mark and now were done! and here is a link to the tutorial video if my instructions weren't clear enough or its just easier to watch a video: https://www.youtube.com/watch?v=ll24Q5lS7zo |
||
Monday, February 10, 2020
two tutorial post (infotech12)
| title: Photoshop Tutorial - Photo Manipulation Lion Squirrel |
|---|
| title: Change the Material of Anything - Overlay Blending Mode | Photoshop Tutorial |
|---|
Friday, February 7, 2020
Wednesday, February 5, 2020
Subscribe to:
Comments (Atom)


