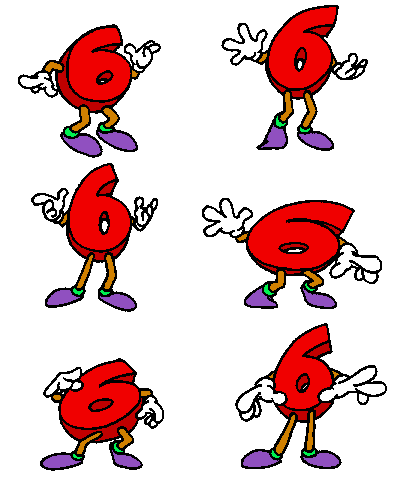
| sixth hour of the ten hours of programming | ||
|---|---|---|
| so today i was learning resizing with variables. some mathematical operators: + adding - subtraction * multiplication / division % take remaining when using multiple operators the computer follows an " order of operators" kinda like the mathematical "BEDMAS" but in here its "PEMDAS". parentheses, exponents, multiplication, division and subtraction. we need to know fractions for resizing!!! we then got to practice a little like a quiz. and i got two questions wrong. so i just redid it and got everything right. after that we had a challenge, the brown bear eyes challenge. so we had to use fractions to change the eyesize to always be the same compared to the facesize. then we had to make sure that the eyes would also move with the face when needed. that took me a while to do bu i did a good job and it was satisfying to see it all move and change size together while looking the same! after that we had another project. the project is called animal attack and i ran out of time on this hour so ill do it for the best, Im honestly not the best at fractions from the top of my head so it takes a while for me to calculate them. |
Saturday, May 2, 2020
sixth hour of the ten hours of programming (infotech)
fifth hour of the ten hours of programming (infotech)
| fifth hour of the ten hours of programming | ||
|---|---|---|
| so today i continued with the animation project shooting star which i didn't have time to start yesterday. so all i had to do was animate a dot shooting like a star and add more stars in the background and that's all i did. i made two stars move and five still stars in the background. so next lesson is the interactive programs. so what i learned in this lesson was how to make the objects move where the mouse is by writing mouseX and mouseY, but it always has to be inside the draw function. then we had two challenges: the tasty tomato and the mouse movement mania. the tomato one we just had to add bites as if we where eating it. in the mouse movement mania we had to change the size of a circle, change the color of the circle and add the stroke with a different color as well. and that's all for the integrative programs. next is becoming a community coder. so we can evaluate other peoples projects and comment and add suggestions too help them. and learn something new as well while doing that. we also shouldn't be afraid to ask for help which i need to practice because I'm shy to do so. thats all for this hour. next will be resizing with variables which is a bonus. |
Thursday, April 30, 2020
forth hour of the ten hours of programming (infotech)
| forth hour of the ten hours of programming | ||
|---|---|---|
| so today i was learning animation basics! finally! an animation is a bunch of drawing all flipping in a sequence to make the objects or pictures move. so the first new command we are learning is the "draw = function( ) { " which makes all lines of code inside run repeatedly. so we put our picture's code into the draw function space and move "var" to the outside on top, that way it always starts there, then add a new command to change the existing var with whatever command we need it to move, example: var x = 10; draw -function( ) { (whatever the code for the picture is) x = x + 1; }; that way we get to replay that function over and over again. now i have a challenge to do, the exploding sun. i did forget to put the first var outside the draw function but i got it in the end. i made the small animation which was just making the sun get bigger. we also learned a few shortcuts. so instead of writing x + x = 2; we can just write x + = 2; and also programmers like to write + 1 a lot so they came up with an easier way of writing that all the time just by writing ++. then we had another challenge, parting clouds challenge. and i had a bit of trouble at first but i got it in the end. so what i did was just make the clouds go in the opposite direction of the sun which was getting bigger and bigger. so i spent a lot of time trying ti figure out what i did wrong in the challenge that i didn't have enough time to start of the project so ill do that later and also start on the interactive programs. |
Wednesday, April 29, 2020
third hour of the ten hours of programming (infotech)
| third hour of the ten hours of programming | ||
|---|---|---|
| so today i was learning variables. we can type out "var" then what we want to represent like "eyesize" we always have to add an equal sign (gets) then the number and we can layer replace already existing numbers in other shapes with "eyesize" and then any number that has that will change to the number you chose for the eyesize! but the command does have to be at the top because the computer reads from up to down. i also took the small "test" to check how well i knew the variables. we had 4 questions and i got all 4 of them right on the first try! right after we had another challenge. which was the bucktooth bunny challenge. first we had to change the eyesize to big and then we had to change the size of his teeth. i did that easily. we can also use variables in math expressions.example: var x = 200 and now we can change an existing number to x but we cant to keep all the shapes in the same place based on the original so what we can do for the others is count how far they are from x and type x - 50 or whatever it is based on the picture! now there is yet another challenge, the funky frog challenge. so we had to draw the mouth for the frog first and after that we just had to add the eyes. then we where done. after that we had a review and then we where done! so next ill be starting on the animation basics! and ill try to add the pictures later as well because i keep forgetting but i do have the screen shots! |
second hour of the ten hours of programming (infotech)
| second hour of the ten hours of programming | ||
|---|---|---|
| so today i was learning coloring. i learned how to color in the shapes i drew, the outline, the background and how to remove the outlines, and how to make the outline thicker. so to fill the background we write "background" and then three numbers pop up indicating the RGB colors the first number is how red the color is, the second how green it is and the thud how blue it is. when we color in the background we need to keep the command at the very top of the others so its in the very back. now to color in the shapes we have a new command, the fill command. now the fill command will fill all shapes that come after the command unless we add more of those commands before the other shapes. to color the outline we have to write the command "stroke" and we can also change the thickness of the outline by writing "strokeweight" and even remove the outline all together with this command "nostroke". and always set the color before the shape commands. i also did another challenge where i had to color in the snowman, the ground, the sun and the background. there is also a documentation for all the commands so we don't have to memorize them all! if we don't know what the function is of the place holders that we get when we copy and paste the commands we can go back to the documentation and click on it to check the function of it in a lot of detail. after that we got a project to do which was called: whats for dinner? so i just drew some fruits like grapes, orange, and an apple. so thats all i did for this hour next hour ill be doing the next lesson:variables. |
Monday, April 27, 2020
First hour of the ten hours of programming (info tech)
| first hour of the ten hours of programming | ||
|---|---|---|
| so i chose to study the drawing and animation for the ten hours of programming because i want to learn how to animate better and for the first hour i looked at the intro to programing and drawing basics. in the intro to programing it just showed what programming is, and for the drawing basics i learned that when you create new shapes the ones on the lower levels show up at the top of the other shapes. i learned how to create (ellipse, rect, line) circles, ovals, squares, rectangles and lines. i learned that when we are coding them we have to write 4 numbers indicating where we want it and how we want it, the first two numbers control where the shape is the first one being left and right and the second being up and down. and the last two control how wide or thin the shape is. we code with first choosing which shape we want (ellipse, rect, line) the we add brackets and put the 4 numbers in and after that we have to add this ; mark at the end so it appears on the blank space. we can also add the name or title to the object so we dont forget which one it is on the picture by adding two slashes like this // and then adding the name. i did the challenge to create the snowman with the circles for the body and a rectangle for the background and two lines for the arms. and thats all i did for today ill do more tommorow/ |
Wednesday, February 26, 2020
Photoshop Morphing - YOUR OWN tutorial (infotech12)
| squirrion | |||
|---|---|---|---|
|
lion
|
squirrel
|
||
|
finale product should look like
|
tutorial:
1. get our two pictures, unfortunately I did not find the same lion as in the video
2.name the layers 3. duplicate the squirrel layer 4.use the patch tool on the copy to remove the head of the squirrel 5. go to the lion picture and use the lasso tool to select the lions head 6.copy and paste it on the squirrel image 7.add the vector mask underneath the lion layer 8.using the pen tool get rid of the rest of the background 9.if its not working for an odd reason change the color of the pen to black 10.crop the lions head to fit the squirrel 11.erase some of the lion to show the squirrels arm 12.drop the opacity and hardness on the pen tool and erase the lions main a bit to blend with the squirrels neck 13.go to color balance and adjust the lions head to be as same looking as the squirrel 14.then we go to brightness/contrast and adjust the lions head 15.the merge the lions heads with the adjustments we added 16.select the smudge tool and go around the main to add more hair 17.with the pen tool add the whiskers 18.go to photo filter and make the density 50% 19.last just add the watermark and do whatever more you want | ||
Thursday, February 20, 2020
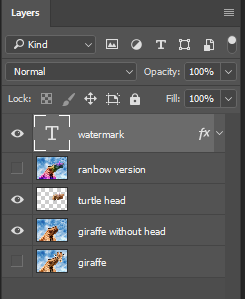
Photoshop Morphing - CassoGirafurtle (infotech12)
| CassoGirafurtle | ||
|---|---|---|
|
cassowary
|
giraffe
|
matamata turtle
|
|
cassogirafurtle
|
tutorial
1. first we get the pictures we want 2.we cut the parts of the animal we want and save them 3.don't forget to rename each layer 4.refine the edge of the animals to clean up the edges 5.add the parts of the animals to the main picture 6.use clone stamp tool to merge the animals together and make it look better or like they belong together. 7. select different animal parts and select color balance to change the color of the animal as close the main as possible 8. add the water mark 9.you can change the background if you want I didn't, and do whatever else you want. | |
Thursday, February 13, 2020
Photoshop Morphing - CrocoFrog (infotech12)
photoshop morphing- crocofrog
|
||
|---|---|---|
|
original frog
|
original crocodile
|
|
| progress
1. get your images
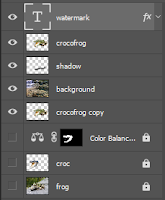
2. size down the frog image to 1024 pixels in width 3. remember to rename your layer too frog 4. now that we're done with the frog image we go to the crocodile image 5. don't forget to rename the layer to croc or crocodile 6. now for the most time consuming step, erase the background of the croc picture 7. we also don't want the neck so erase by the jawline 8. now quick select the cut out of the croc head 9. go to the refine edge and play with the values until you like how it looks, try to make it look like its not cut out 10. deselect the image and now were ready to move the head to the frog 11. ctrl a, and ctrl c, to copy the head and ctrl v, to paste it onto the frog picture 12. ctrl t, to select the croc head 13. hold shift and scale down the croc head and move it around to fit the frog, then press enter when your done 14. select your clone stamp tool and hold down alt on the area that you want to clone 15. now lets get rid of the crocs eye by left clicking on it 16. now just like how we covered the crocs eye with the clone stamp tool, we will blend the crocks skin with the frogs on the face and jaw 17. now with the eraser tool we will erase the croc by the frogs eyes to open them up more 18. now go back to the quick selection tool and select the crocs head again 19. now go down to the, create new fill adjustment layer, and choose color balance 20. with midtones selected, drop the red to -13 and the yellow to -98 21. now with the eraser tool erase the mouth and teeth to its original color 22. use the burn tool to add a bit of shadow to the jaw 23. then use the brush with the opacity of 81% to create a shadow under the crocs mouth, make sure your on the frog layer for this part! 24. you can change the background like I did just by cutting out the frog from its original picture and adding a new background pic 25. add your water mark and now were done! and here is a link to the tutorial video if my instructions weren't clear enough or its just easier to watch a video: https://www.youtube.com/watch?v=ll24Q5lS7zo |
||
Monday, February 10, 2020
two tutorial post (infotech12)
| title: Photoshop Tutorial - Photo Manipulation Lion Squirrel |
|---|
| title: Change the Material of Anything - Overlay Blending Mode | Photoshop Tutorial |
|---|
Friday, February 7, 2020
Wednesday, February 5, 2020
Monday, January 27, 2020
Subscribe to:
Comments (Atom)


